Spotting designer quality in a thrift store is a skill, not luck, based on understanding a garment’s hidden language of fabric, construction, and history.
- True value is revealed through material forensics; natural fibers possess a cellular structure that inherently outlasts synthetic plastics.
- Simple, no-sew « silhouette hacks » and an understanding of historical sizing shifts can transform an overlooked piece into a modern statement.
Recommendation: Stop hunting for logos and start auditing for quality. Assess every potential find for its material integrity, construction details, and transformation potential before you even think about the brand name.
The thrill of the hunt. It’s that electric feeling of flipping through endless, musty racks, your fingers grazing over cheap polyester and worn-out denim. Then, something catches your eye. A texture. A color. A certain weight to the fabric. You pull it out, and your heart beats a little faster. Could this be *the one*? For any budget-conscious fashion lover, especially members of Gen Z who value sustainability and uniqueness, this is the adrenaline rush that makes thrift shopping an adventure, not just a transaction.
Most people will offer you the same tired advice: « check the label for a designer name » or « only shop in rich neighborhoods. » That’s amateur hour. We’re not just looking for a brand name; we’re hunting for quality, for potential, for the story woven into the fabric. This is about seeing the bones of a great garment, whether it’s a forgotten YSL blazer or an unbranded, perfectly crafted linen shirt that just feels expensive. It’s about recognizing the tell-tale signs of luxury that go far beyond a simple logo, from the intricate weave of the fabric to the subtle clues in a vintage size tag.
The secret isn’t about being lucky. It’s about becoming a Garment Detective. It’s about training your eyes and hands to read the clues that everyone else misses: the scientific reason behind a fabric’s drape and longevity, the story a vintage size tag tells about a bygone era of fashion, and the hidden potential in a silhouette that’s just one clever, no-sew trick away from perfection. Forget random searching; this is about systematic investigation.
This guide will arm you with the forensic skills to do just that. We’ll decode the science of fabric, master the art of no-sew alterations, and learn the strategic frameworks for high-low styling that turn five-dollar finds into priceless treasures. Your adventure starts now.
Summary: The Garment Detective’s Guide to Finding Designer Gems
- Why Natural Fibers Last 10 Years Longer Than Synthetics?
- How to Crop a Blazer Without a Sewing Machine?
- 70s vs 9s Sizing: How to accurate Predict Fit Before Trying On?
- The « Shein Haul » Mistake That Fills Landfills with microplastics
- How to Style a $5 Shirt with $200 Shoes to Look Expensive?
- Why Your « Made in Italy » Shirt Might Not Qualify for Tariff Exemptions?
- Downcycling vs Upcycling: Which Process Actually Preserves Value?
- How to Update Your Look for the Season Without Buying New Clothes?
Why Natural Fibers Last 10 Years Longer Than Synthetics?
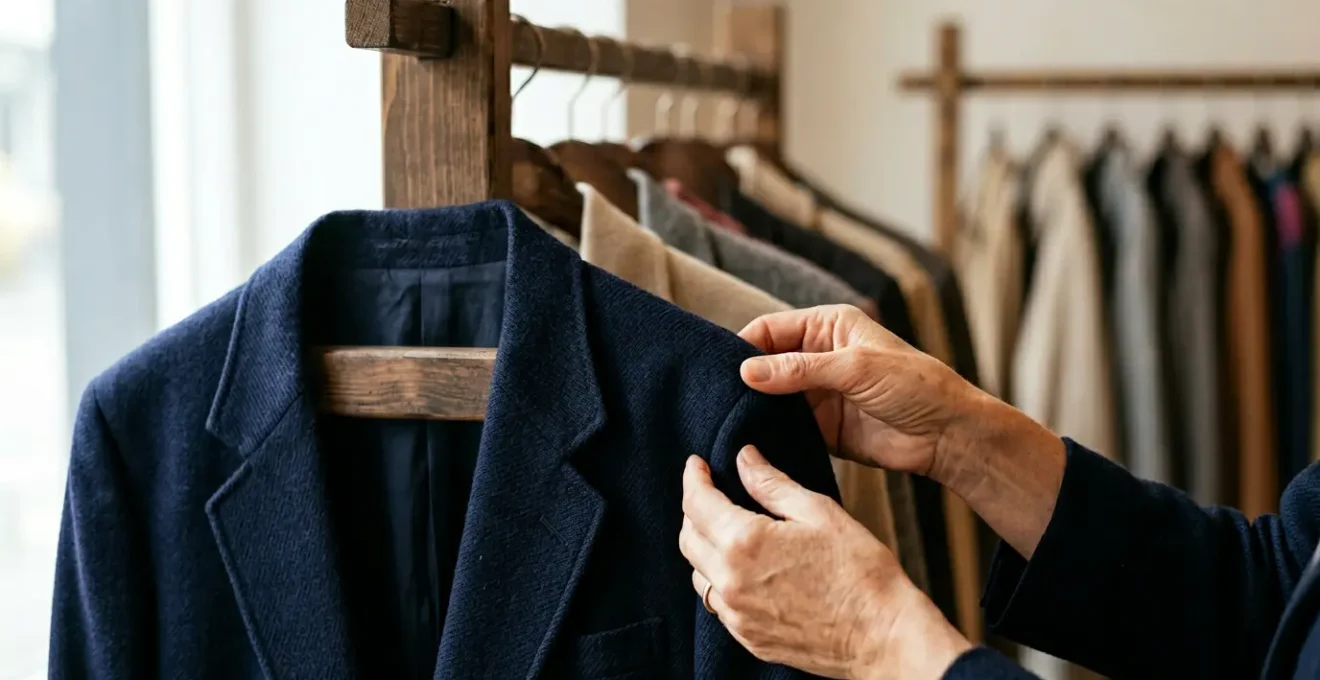
The first sense a garment detective trusts is touch. Run your fingers over a rack and you can feel the difference between a cheap, lifeless polyester shirt and a piece with character—a soft wool, a crisp linen, a weighty silk. This isn’t just fashion snobbery; it’s a lesson in material forensics. Natural fibers possess a complex, resilient microstructure that is simply superior to the plastic filaments of their synthetic counterparts. They breathe, manage moisture, and hold their shape in a way that polyester, acrylic, and nylon never can.
Consider the architecture of wool. Each fiber is covered in tiny, overlapping scales that allow it to be both water-resistant and moisture-wicking. Linen, derived from the flax plant, has a long-staple fiber that gives it incredible tensile strength, making it more durable with every wash. Synthetics, on the other hand, are essentially plastic. They trap heat and sweat, start to smell quickly, and degrade under UV light and friction, shedding microscopic plastic pieces with every wear. Choosing vintage or secondhand natural fibers is a powerful act of sustainability. In fact, research from the Ellen MacArthur Foundation demonstrates that extending clothing lifespan is one of the most effective ways to achieve a 20-30% reduction in carbon, water, and waste footprints.

This microscopic resilience is what gives a vintage wool coat or a 30-year-old cotton shirt its tangible quality. It’s why they hang better, feel better, and last longer. Before you even look at a brand tag, you should be conducting a quick field audit of the material itself. A high-quality garment speaks through its fabric first.
Your 5-Point Field Audit for Garment Quality
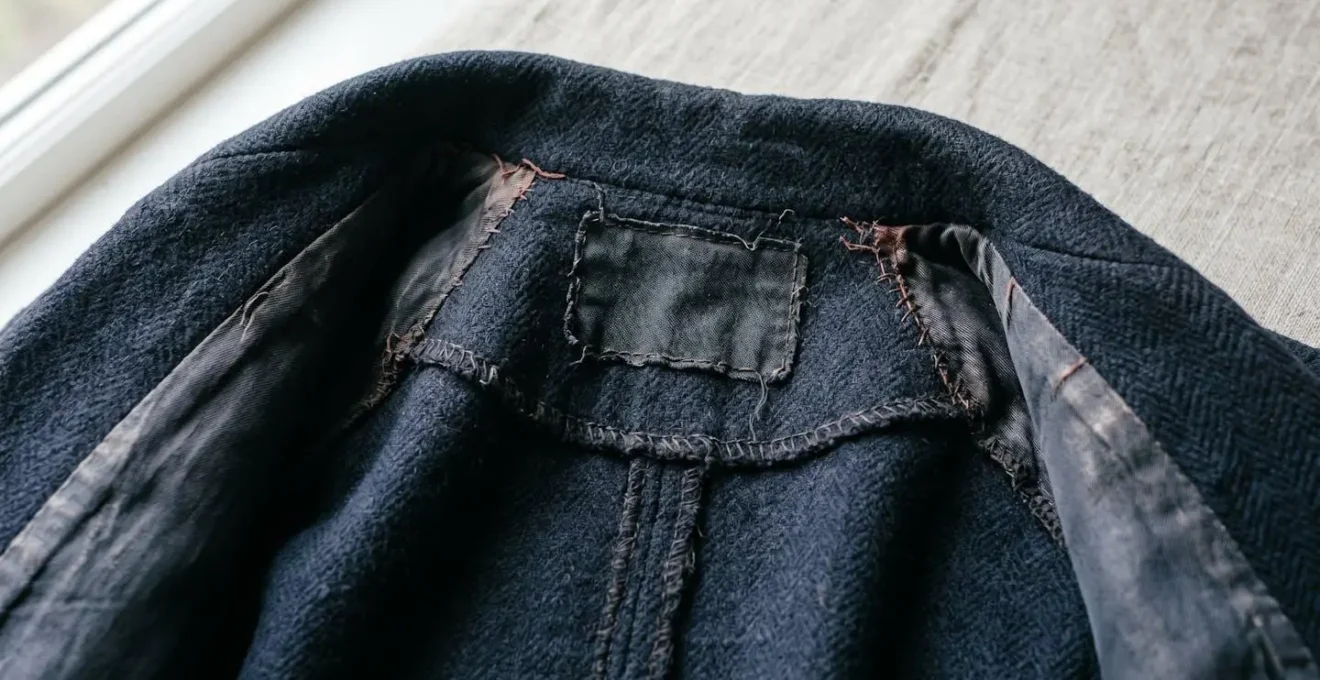
- Identify quality signals: Assess all points of contact. Scrutinize the fabric’s feel and weight, the density of the stitching, the quality of the hardware (metal vs. plastic zippers, substantial buttons), and the information on the label—even if it’s an unfamiliar brand.
- Gather the evidence: Inventory the item’s context. Compare it to similar pieces on the rack. Does this one feel heavier, better constructed? Note the country of origin, as certain countries are known for specific textile expertise.
- Test against your goals: Confront the piece with your wardrobe’s needs. Does the material, cut, and condition align with your vision of a timeless, high-quality garment? Or is it a trendy, disposable item that won’t last?
- Assess the « X-Factor »: Gauge its emotional resonance and memorability. Is the pattern truly unique? Does the color evoke something special? A generic item is just cloth; a great find has a distinct personality that elevates your style.
- Map its future: Create a clear integration plan. How will you wear this? Does it need a simple upcycle (like a crop) or is it perfect as-is? If it doesn’t fit your life and style right now, leave it for the next detective.
How to Crop a Blazer Without a Sewing Machine?
You found it. The perfect oversized 80s wool blazer with shoulders that could command a boardroom. The fabric is impeccable, the construction is solid, but the length is… a bit much. Don’t you dare leave it behind. This is not a problem; it’s an opportunity for a bit of what we call Silhouette Hacking. A garment’s length and proportions are not fixed laws; they are invitations for creative intervention. And the best part? You don’t need a sewing machine, a tailor, or any specialized skills to completely change the vibe of a piece.
Cropping a blazer is one of the most impactful no-sew alterations you can perform. It can take a dated, longline jacket and turn it into a chic, contemporary piece that pairs perfectly with high-waisted trousers or a slip dress. It’s about seeing the potential locked within the original garment and liberating it with a few simple, strategic moves. Forget intimidating patterns and complex stitches; we’re using clever tricks and accessible tools to achieve a professional-looking result in under an hour.
Here are three proven methods from the professional thrifter’s playbook, each yielding a different aesthetic:
- The Raw Edge Finish: For a deconstructed, edgy look. First, measure and mark your desired crop length with tailor’s chalk on the blazer’s interior. Using sharp fabric scissors, cut cleanly along the line. To prevent the new edge from unraveling over time, apply a thin layer of Fray Check liquid sealant to the raw edge and let it dry for 24 hours.
- The Architectural Fold: The perfect temporary solution. Instead of cutting, simply fold the excess length of the blazer up and to the inside to create your cropped effect. Secure the fold from the interior with a few strategically placed safety pins, or make a statement by securing it from the exterior with decorative brooches at the side seams and back center.
- The Hem Harvest: The most professional-looking technique. Carefully detach the blazer’s original finished hem using a seam ripper. Cut the blazer body to your new desired length (minus the height of the hem). Then, use a fusible bonding web and an iron to reattach the original hem to the new edge, giving you a perfectly finished, factory-style crop.
By mastering these techniques, you unlock a new tier of thrifting. You’re no longer limited to what fits perfectly off the rack; you’re now a designer, capable of reshaping garments to fit your vision.
70s vs 9s Sizing: How to accurate Predict Fit Before Trying On?
Here’s the biggest trap for the rookie garment detective: trusting the number on the size tag. That little label is not a fixed unit of measurement; it’s a historical artifact. A tag that reads « Size 12 » on a 1970s polyester dress tells a completely different story than a « Size 12 » on a 1990s silk slip. Relying on that number without understanding its context is the fastest way to end up with a piece that’s either two sizes too small or comically large. You have to learn to read the *era*, not just the number.
The phenomenon is known as vanity sizing. Starting in the 1980s, brands began shifting their sizing standards, assigning smaller numbers to larger measurements to make shoppers feel better. This means that vintage pieces, particularly those from before 1980, are significantly smaller than their modern-day equivalents. As a rule of thumb, you often need to add 4, 6, or even 8 to the vintage size number to get an idea of its modern-day equivalent. The tag itself can offer clues; the typography, the presence of an ILGWU (International Ladies’ Garment Workers’ Union) tag, and the care instructions all help date the piece.
However, the most reliable way to predict fit without a dressing room is to know your own measurements (bust, waist, hips) and measure the garment flat. But for a quick assessment on the thrift floor, understanding the general shifts in sizing is your secret weapon. This decoder ring helps translate the language of vintage labels into today’s fit.
| Modern Size (2020s) | 1970s Label Size | 1990s Label Size | Key Measurement Difference |
|---|---|---|---|
| US 4 | 10-12 | 6-8 | 1970s: fitted waist, A-line hips |
| US 6 | 12-14 | 8-10 | 1970s: +4-6 sizes; 1990s: +2-4 sizes |
| US 8 | 14-16 | 10-12 | Vanity sizing introduced in 1980s |
| US 10 | 16-18 | 12-14 | 1990s closer to modern ratio |
| As this vintage sizing guide analysis shows, you should add about 4 sizes for 1970s garments and 1-2 sizes for 1990s items. | |||
The « Shein Haul » Mistake That Fills Landfills with microplastics
Let’s talk about the enemy: the cheap, fleeting thrill of the ultra-fast-fashion haul. It feels good for a moment—a mountain of new clothes for the price of a pizza. But those piles of polyester have a dark secret that extends far beyond their questionable labor practices and their tendency to fall apart after one wash. Every single one of those synthetic garments is a tiny, plastic time bomb waiting to pollute our planet for centuries.
When you choose a vintage wool sweater or a secondhand cotton dress, you’re not just getting a higher quality item; you’re actively fighting a war against plastic pollution. Synthetic textiles like polyester, nylon, and acrylic are derived from petroleum. They are, quite literally, plastic. With every wash, these garments shed thousands of microscopic plastic fibers. These microfibers are too small to be caught by wastewater treatment plants, so they flow directly into our rivers and oceans. The scale of the problem is staggering. Environmental research estimates that washing synthetic textiles releases about 500,000 tons of microfibers annually into the oceans—the equivalent of 50 billion plastic bottles.
This plastic pollution doesn’t just disappear. An IUCN report further highlights the crisis, estimating that around 35% of all primary microplastics in the oceans come from the laundering of these synthetic textiles. These particles are ingested by marine life, accumulating in the food chain and, ultimately, ending up on our plates. The « Shein haul » mistake is thinking that cheap clothes are disposable. They aren’t. They just break down into a more insidious and permanent form of pollution. Thrifting isn’t just a trend; it’s a conscious act of rebellion against a system that floods our world with plastic.
How to Style a $5 Shirt with $200 Shoes to Look Expensive?
This is the true art of the high-low mix. Anyone can throw on expensive clothes and look presentable. The real master, the seasoned garment detective, is the one who can make a $5 thrifted silk shirt look like it was born to be paired with their $200 leather loafers. The secret isn’t in the individual items, but in the alchemy that happens between them. It’s about creating a visual « bridge » that elevates the entire look, making the inexpensive piece look intentional and the expensive piece look even better.
The most common mistake is simply putting a cheap item next to an expensive one and hoping for the best. This often just makes the cheap item look cheaper and the expensive item look out of place. The key is to create a cohesive story through texture, fit, and strategic accessories. You need a framework. The « Texture Triangle » is a simple but powerful method for achieving this visual harmony. It forces you to think about your outfit as a whole, rather than a collection of disparate parts.
Here’s how to build an expensive-looking outfit from the ground up, using your thrifted find as the foundation:
- Establish the Foundational Texture: Start with your thrifted piece, like a matte cotton shirt. This is your base. The most important factor here is fit. Ensure it’s properly fitted through the shoulders and torso, even if it requires minor (no-sew!) adjustments.
- Anchor with a Luxury Texture: Introduce your expensive item, like leather shoes or a designer bag. This provides the second point of the triangle and anchors the outfit’s luxury perception with its refined surface quality and subtle sheen.
- Bridge with a Third Texture: Complete the triangle with a third, distinct texture that contrasts with the first two. This could be the raw grain of denim jeans, the nubby weave of a wool blazer, or the fluid shine of a silk scarf. This « bridge » texture creates visual depth and makes the combination of high and low feel deliberate and sophisticated.
- Reinforce with Quality Accessories: Your belt and any other accessories should match the quality level of your most expensive piece (the shoes). These items act as visual connectors, pulling the entire look together.
- Correct the « Cheap Fit » Giveaways: Pay close attention to the small details that scream « cheap. » Use fashion tape to fix puckering button plackets, insert collar stays to give a flimsy collar structure, and pin droopy shoulder seams from the inside. These tiny fixes have a huge impact on the overall perception of quality.
By following this method, you’re not just wearing clothes; you’re engineering a look. You’re using texture and fit to tell a story of effortless, intelligent style.
Why Your « Made in Italy » Shirt Might Not Qualify for Tariff Exemptions?
You spot it across the aisle, a beacon of hope on a crowded rack: the « Made in Italy » label. It’s the thrifting jackpot, a symbol of quality craftsmanship, luxurious materials, and timeless style. Or is it? A true garment detective knows that labels, especially those that carry as much weight as « Made in Italy, » can sometimes tell a very convenient, and not entirely complete, version of the truth. The phrase doesn’t always mean what you think it means, particularly in the complex world of global manufacturing and trade law.
The core of the issue lies in the concept of « substantial transformation. » For a product to be legally labeled as made in a certain country, it must have undergone its last « substantial transformation » there. This rule is designed to be flexible, but that flexibility can be exploited. A company could have leather tanned in Italy, cut in Romania, stitched in Tunisia, and then have the final buttons and labels attached back in Italy. Because the « essential character » of the item was finalized there, it can often legally carry the coveted label. As one industry expert noted in a discussion on Italian manufacturing:
If the last significant production step that gave the product its essential character happened in Italy, it can be labeled ‘Made in Italy’ even if materials or some parts came from elsewhere.
– Country of Origin Labeling Analysis, Quora Industry Expert Discussion on Italian Manufacturing
This isn’t just a theoretical loophole; it has been tested in court. The legal precedent underscores that the label is often more about where the final, value-adding process happened, not where 100% of the labor or materials originated.
Case Study: Italian Supreme Court Ruling on Misleading Origin Labels
This principle was famously clarified in a 2011 ruling by the Italian Supreme Court. The case involved a leather goods manufacturer who imported items that were fully manufactured in China, using Italian leather. The products were prominently labeled ‘vera pelle Italy’ (real leather Italy), with only a small, easily removable ‘Made in PRC’ sticker. The lower court found this misleading, and the Supreme Court’s analysis established that the « origin » refers to the location of the manufacturer responsible for the final quality control and transformation, not just the provenance of the raw materials. This case solidified the legal importance of where the « substantial transformation » occurs.
So, when you find that « Made in Italy » piece, celebrate the find, but continue your detective work. Examine the quality of the stitching, the feel of the fabric, and the construction details. The label is a clue, not a conclusion.
Key Takeaways
- Prioritize Natural Fibers: Materials like wool, silk, and linen have superior longevity and environmental credentials, making them the primary targets in your thrift hunt.
- Master No-Sew Hacks: Simple techniques like cropping, tucking, and swapping buttons can completely transform a garment’s silhouette without a single stitch, unlocking hidden potential.
- Think Like a Detective: Ignore the size on the tag. Learn to decode vintage sizing, inspect construction, and understand origin labels to assess true quality beyond the brand name.
Downcycling vs Upcycling: Which Process Actually Preserves Value?
So, the garment is flawed. A moth hole in a cashmere sweater, a stubborn stain on a silk blouse, a tear in a pair of vintage jeans. For most shoppers, this is a dealbreaker. For a garment detective, this is a critical decision point. The piece is damaged, but is it worthless? The answer determines its fate: will it be upcycled or downcycled? Understanding the difference is crucial, because one process preserves and even increases value, while the other effectively destroys it.
Downcycling is the process of converting waste materials or useless products into new materials or products of lesser quality. A classic example is turning a stained cotton t-shirt into cleaning rags. You’ve found a new use for the material, but you’ve destroyed its value as a garment. Upcycling, on the other hand, is the art of transforming a flawed or unwanted item into something of higher value or quality. This is where the real magic happens. That moth hole in the cashmere sweater can be covered with creative embroidery, turning a flaw into a feature. That stained silk blouse can be cut up and repurposed into a set of luxury scrunchies or a beautiful scarf. Upcycling is about creative problem-solving and value preservation.
The decision to upcycle or downcycle a thrifted find should be a strategic one, based on the material quality and the brand or style equity of the piece. Not every flawed garment is worth the effort of upcycling. Sometimes, the best you can do is harvest the buttons and downcycle the fabric. This decision matrix can help you determine the best path forward to maximize the value of your finds.
| Material Quality | Brand/Style Equity | Recommended Process | Value Preservation Strategy |
|---|---|---|---|
| Low | High | Upcycling | Save logos/labels; transform damaged areas into design features |
| High | Low | Upcycling | Focus on fabric quality; repurpose material for new high-value items |
| High | High | Professional Restoration | Preserve authenticity; minimal intervention; expert cleaning/repair |
| Low | Low | Downcycling | Harvest usable components; sell fabric scraps; batch simple projects |
| This thrift resale strategy analysis from Swap Boutique highlights how narrative value created through visible mending or transformation can exceed original garment value. | |||
How to Update Your Look for the Season Without Buying New Clothes?
The seasons change. The magazines declare new « must-have » colors and silhouettes. The temptation to buy new things is everywhere. But the savviest style hunters—the true garment detectives—know a powerful secret: a new look isn’t about new clothes. It’s about new ideas. You can completely update your wardrobe for the coming season without buying a single new garment. It’s the ultimate sustainable style challenge, and it forces a level of creativity that is far more rewarding than simply clicking « add to cart. »
The key is to focus on high-impact, low-effort transformations that change the *perception* and *proportion* of the clothes you already own. It’s about looking at your existing wardrobe with fresh eyes and asking, « How can I style this differently? » You can use a specific color, a new tuck, or a simple accessory to shift an entire outfit’s mood from summer to fall, or winter to spring. This approach not only saves money and reduces consumption, but it also deepens your personal style by forcing you to become more inventive with what you have.
Here is a menu of one-hour (or less) seasonal updates that can breathe new life into your closet:
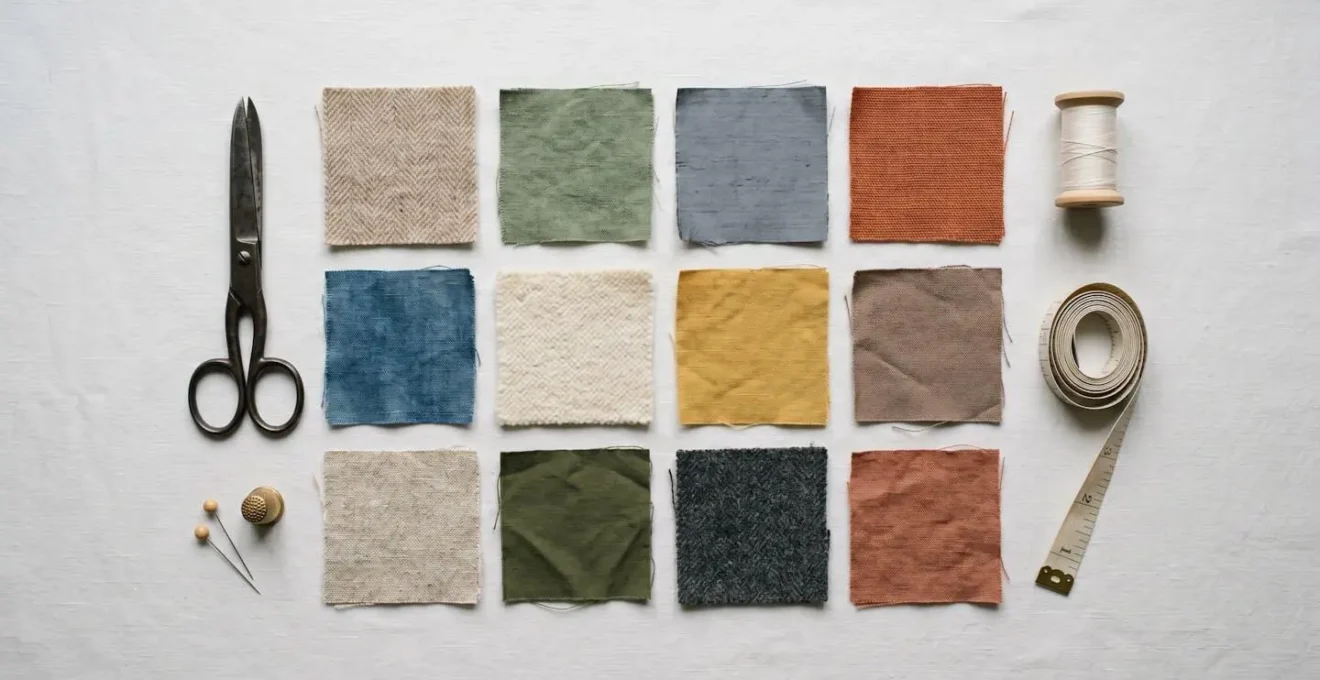
- The Seasonal Accent Color Technique: Select one small accessory—a silk scarf, a belt, socks, or even a shade of lipstick—in one of the season’s key colors (e.g., rust for fall, sage green for spring). Adding this single pop of color to an otherwise neutral base outfit instantly signals seasonal awareness.
- The French Tuck Silhouette Shift: One of the easiest and most effective styling tricks. Simply tuck the very front portion of your shirt, sweater, or blouse into your pants or skirt, leaving the sides and back untucked. This instantly modernizes the silhouette, defines your waist, and creates a more relaxed, contemporary proportion.
- The Strategic Sleeve Roll: How you roll your sleeves can completely change the formality of a garment. For a chic, intentional look on blazers or button-downs, use the « master roll »: fold the cuff back once, then fold the lower sleeve up and over it, leaving the edge of the cuff peeking out. It’s a small detail that makes a big difference.
- The Reversible Button Swap: Spend 30 minutes replacing the standard plastic buttons on a coat, cardigan, or blazer with interesting vintage metal, horn, or mother-of-pearl buttons sourced from a thrift store’s craft section. This is an instant, inexpensive way to make a garment look much more luxurious, and it’s completely reversible.
- The Temporary Hem Tape Crop: Want to try the cropped pant or dress trend for a season without commitment? Use iron-on hem tape to create a temporary new hemline. When you’re ready to return to the original length, the tape releases cleanly with the heat of an iron, preserving the garment.
By treating your closet as a laboratory for style experiments rather than a collection of static objects, you’ll never feel like you have « nothing to wear » again.
So get out there. The racks are waiting, filled with overlooked potential and hidden stories. Your next great find isn’t just a piece of clothing—it’s a challenge, a creative project, and a statement. Start your hunt, and show the world what you can create.